The handbook ends with two illustrated appendices: every road traffic sign, grouped by family, and every road marking. This module explains how each family looks and behaves, then the lines painted across and along the road. Use the searchable Road signs library alongside it to look up any individual sign.
About 20 minutes
9 sections
Handbook Appendix: Road traffic signs, pp. 185–224
Chapter 10 · 9 sections
After this chapter you can
Tell the five sign families in the appendix apart by shape and colour.
State how far ahead of a hazard a warning sign is normally placed.
Explain how long a prohibitive sign applies after you pass it.
Distinguish a Give Way line from a Stop line.
Explain which lines along the road you may and may not cross.
Recognise bus lanes, lane arrows, box junctions and kerbside parking markings.
Section 1 of 9
Warning signs (1 to 54)
Red triangles that tell you about a hazard in time to adjust your speed and position.
Source: Handbook Appendix: Road traffic signs, p. 185
Rule
How warning signs look and where they stand
A warning sign is usually a red triangle pointing upwards, with a black symbol or words on a white background (sometimes yellow).
It is normally placed 150 to 250 metres before the hazard it warns about. In built-up areas inside city limits the distance may be shorter.
Fig. Figure 10.1How warning signs look and where they stand. Picture from Handbook Appendix: Road traffic signs, p. 192
Round signs with a red border that forbid a manoeuvre or a type of vehicle.
Source: Handbook Appendix: Road traffic signs, p. 193
Rule
How prohibitive signs look and how long they apply
Prohibitive signs are round, with a red border on a white background and a black symbol. They show that certain manoeuvres or vehicle types are forbidden.
A prohibitive sign applies from the moment you pass it until you reach the next crossroads, unless local circumstances or the sign itself indicate otherwise. Failing to obey one is an offence punishable by law.
Fig. Figure 10.3How prohibitive signs look and how long they apply. Picture from Handbook Appendix: Road traffic signs, p. 197
Source: Handbook Appendix: Road traffic signs, p. 193
Example
Prohibitive signs worth knowing cold
These carry extra conditions in the handbook.
Fig. Figure 10.4Prohibitive signs worth knowing cold. Picture from Handbook Appendix: Road traffic signs, p. 193
No Entry: applies to all vehicles that face the sign.
STOP: all vehicles must stop and give way. Stop at the line or, if there is no line, immediately before the light or sign.
No overtaking: applies until you reach the end-of-restriction sign.
Maximum speed: applies until another sign imposes a different limit.
No stopping: applies to the side of the road on which the sign stands.
End of restriction: applies to and cancels any prohibitive sign.
Blue circles that tell you what you must do or where you must go.
Source: Handbook Appendix: Road traffic signs, p. 199
Rule
A positive instruction is also a ban on everything else
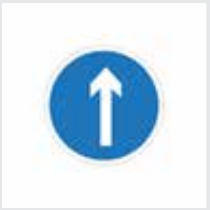
Mandatory signs are round, with a white border on a blue background. They give a positive instruction instead of a restriction.
An instruction for one type of vehicle or manoeuvre is at the same time a ban on all other types. A mandatory direction sign means vehicles may be driven only in the direction of the arrow or arrows.
Fig. Figure 10.5A positive instruction is also a ban on everything else. Picture from Handbook Appendix: Road traffic signs, p. 199
Source: Handbook Appendix: Road traffic signs, p. 199
Section 4 of 9
Information signs (300 to 410)
Signs in many shapes and colours that help you find your road, services and destinations.
Source: Handbook Appendix: Road traffic signs, p. 203
Note
What information signs do
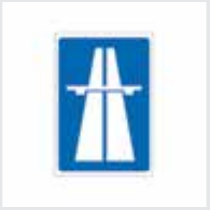
Information signs come in a variety of shapes and colours. They help you find and follow the road you want, such as a motorway, and direct you to car parks, destinations, distances, service stations and other amenities.
Fig. Figure 10.6What information signs do. Picture from Handbook Appendix: Road traffic signs, p. 203
Source: Handbook Appendix: Road traffic signs, p. 203
Rule
The primary road sign
Traffic on a primary road has priority: vehicles entering from a minor road must give way. The sign may be repeated on a primary road after every crossing or junction.
At the end of a motorway, get ready to meet oncoming traffic again.
Fig. Figure 10.7The primary road sign. Picture from Handbook Appendix: Road traffic signs, p. 203
Source: Handbook Appendix: Road traffic signs, p. 203
Section 5 of 9
Temporary signs (500 to 517)
Orange signs set up for road works.
Source: Handbook Appendix: Road traffic signs, p. 211
Note
Orange means road works
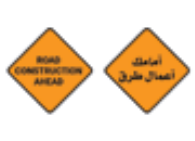
Temporary signs have an orange background and are set up in conjunction with road works. They announce construction, detours, closed lanes and reduced speeds, and other designs can be made for a specific need.
Fig. Figure 10.8Orange means road works. Picture from Handbook Appendix: Road traffic signs, p. 211
Source: Handbook Appendix: Road traffic signs, p. 211
Section 6 of 9
Lines across the road
Give Way lines and Stop lines tell you where to wait.
Source: Handbook Appendix: Road markings, p. 217
Rule
Give Way line: broken
A broken white line across your lane shows that traffic on the road you want to enter has priority. It marks where you should stop, if necessary, to take your final look.
You normally find one at the entrance to a roundabout: traffic inside the roundabout has priority and you must give way.
Fig. Figure 10.9Give Way line: broken. Picture from Handbook Appendix: Road markings, p. 217
Source: Handbook Appendix: Road markings, p. 217
Rule
Stop line: continuous
A single continuous line across your half of the road shows where you must stop at junctions with Stop signs or at junctions controlled by traffic lights.
Fig. Figure 10.10Stop line: continuous. Picture from Handbook Appendix: Road markings, p. 217
Source: Handbook Appendix: Road markings, p. 217
Section 7 of 9
Lines along the road
Centre lines, warning lines, prohibitory lines and edge lines: which you may cross and which you may not.
Source: Handbook Appendix: Road markings, pp. 218–220
Definition
Centre line and warning line
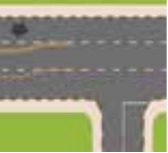
The centre line is a broken line marking the middle of the road. On main roads each mark is 3 metres long with 9 metres between marks.
A warning line reverses that pattern: 9-metre marks with 3-metre gaps. It replaces centre and prohibitory lines on roads less than 7 metres wide and can warn of a prohibitory line or hazard ahead. Crossing it is prohibited unless you are certain the road is clear.
Fig. Figure 10.11Centre line and warning line. Picture from Handbook Appendix: Road markings, p. 218
Where the single broken centre line gets longer, expect a hazard ahead.
Source: Handbook Appendix: Road markings, p. 218
Rule
Prohibitory lines
Crossing or straddling a prohibitory line is forbidden, even with a single wheel. Crossing or straddling a double prohibitory line is always prohibited.
Where there are two lines and the one nearest you is broken, you may cross both to overtake, as long as you can finish before a solid line begins on your side.
Fig. Figure 10.12Prohibitory lines. Picture from Handbook Appendix: Road markings, p. 219
Arrows on the road often warn that a double white line is coming. Do not start to overtake when you see them on your side.
A restricted area must not be crossed or straddled. The smaller ones are painted solid white.
Source: Handbook Appendix: Road markings, pp. 218–219
Rule
Edge lines
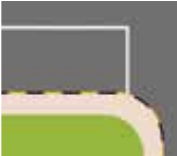
The edge of the road is usually marked with a broken line, which you may cross when you temporarily need the shoulder, for example to help another vehicle overtake.
A continuous edge line is used on motorways where driving on the shoulder is unsuitable. Never straddle or cross it. Edge lines are normally white but can be yellow.
Fig. Figure 10.13Edge lines. Picture from Handbook Appendix: Road markings, p. 219
Source: Handbook Appendix: Road markings, p. 219
Note
Reflective studs (cat’s eyes)
White reflective studs are spaced in a row between lanes or along the centre of the road. Flashing amber studs warn that you are approaching a pedestrian crossing. At road works, studs may show which lanes are in operation.
Source: Handbook Appendix: Road markings, p. 220
Section 8 of 9
Reserved lanes, arrows and speed reduction lines
Markings that sort traffic into the right lane and slow it down.
Source: Handbook Appendix: Road markings, pp. 221–222
Rule
Bus lanes and cycle lanes
Only buses may use a bus lane during the operating times shown on the sign; outside those times all vehicles may use it. If no times are shown, it operates 24 hours a day. Do not drive or park in a bus lane while it is in operation.
Do not drive or park in a cycle lane marked by a solid white line. If the line is broken, do not drive or park in it unless this is unavoidable.
Fig. Figure 10.14Bus lanes and cycle lanes. Picture from Handbook Appendix: Road markings, p. 221
Source: Handbook Appendix: Road markings, p. 221
Rule
Lane arrows
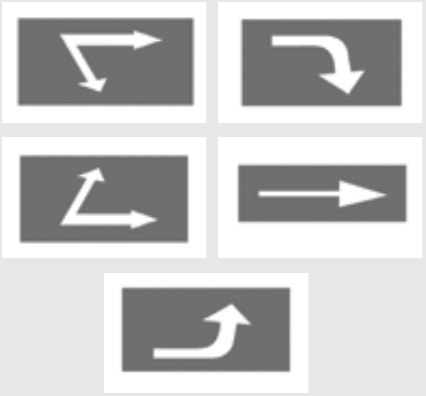
Lane arrows are painted well before a junction so that you can get into the correct lane in good time. If prohibitory lines border the lane, you must follow the direction of the arrow. Otherwise the arrow suggests an appropriate route.
Fig. Figure 10.15Lane arrows. Picture from Handbook Appendix: Road markings, p. 222
Source: Handbook Appendix: Road markings, p. 222
Note
Speed reduction lines
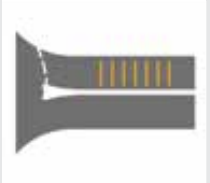
Raised yellow lines across the carriageway make you aware of your speed after a period of faster driving. They are sometimes painted before roundabouts or speed humps, when entering a village, or before a particular hazard. Reduce your speed in good time.
Fig. Figure 10.16Speed reduction lines. Picture from Handbook Appendix: Road markings, p. 222
Source: Handbook Appendix: Road markings, p. 222
Section 9 of 9
Temporary markings, parking and box junctions
Yellow and orange paint: road works, kerbside restrictions and junctions that must stay clear.
Source: Handbook Appendix: Road markings, pp. 223–224
Rule
Temporary markings win
At road works, orange or yellow markings and yellow reflective studs may show the lanes in operation. Temporary road markings take precedence over ordinary road markings.
Fig. Figure 10.17Temporary markings win. Picture from Handbook Appendix: Road markings, p. 223
Source: Handbook Appendix: Road markings, p. 223
Rule
Parking markings
Parking spaces are marked with continuous or broken white lines, and all four wheels of a parked car must be inside them. Spaces for disabled persons may only be used by holders of special permits.
Fig. Figure 10.18Parking markings. Picture from Handbook Appendix: Road markings, p. 223
Broken yellow kerbside line: parking prohibited. Used at bus stops and on kerbs at junctions.
Continuous yellow line: no stopping or parking.
Source: Handbook Appendix: Road markings, p. 223
Rule
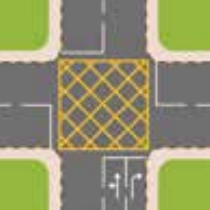
Box junctions
Yellow criss-cross lines mark a box junction. Their purpose is to keep the junction clear, so you must not enter the box unless your exit road is clear.
One exception: you may enter when you want to turn left and are only prevented from doing so by oncoming traffic.
Fig. Figure 10.19Box junctions. Picture from Handbook Appendix: Road markings, p. 224
Source: Handbook Appendix: Road markings, p. 224
Chapter 10 recap
Remember this
Warning signs stand 150 to 250 metres before the hazard; closer in built-up areas.
A prohibitive sign applies until the next crossroads unless something indicates otherwise.
A mandatory sign’s instruction is also a ban on every other option.
Broken line across your lane: give way. Continuous line across your half of the road: stop.
Never cross or straddle a prohibitory line, not even with one wheel.
Temporary road markings take precedence over ordinary markings.
Do not enter a box junction unless your exit is clear.
Common misconceptions
Myth
: A prohibitive sign only applies at the spot where it stands.
Fact
: It applies from the moment you pass it until the next crossroads, unless local circumstances or the sign itself indicate otherwise.
Source: Handbook Appendix: Road traffic signs, p. 193
Myth
: A bus lane with no times on the sign can be used when it looks empty.
Fact
: Where no times are shown, the bus lane is in operation 24 hours a day.
Source: Handbook Appendix: Road markings, p. 221
Myth
: If the light is green I can always drive into a box junction.
Fact
: You must not enter a box junction unless your exit road is clear, whatever the light shows. The only exception is waiting to turn left when oncoming traffic alone is stopping you.
Source: Handbook Appendix: Road markings, p. 224
Chapter 10 · practice
Check your knowledge
6 quick questions on this chapter, with an explanation after each answer. Or practise all 14 questions written for it.